Welcome to Bookablebiz Listing Guide
To create a listing on Bookablebiz, follow these simple steps to ensure your service is effectively showcased to potential customers.
The process includes setting up your location, resources providing the service, describing key details about your service, uploading good-quality images, and finalizing the listing by setting pricing and availability.
This guide will walk you through each step, ensuring your service is ready to be discovered by clients looking for the expertise and solutions you offer.

Let’s start:
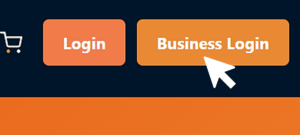
- Login into your business account through Business Login on the homepage.
- You will then see your Vendor Dashboard as shown below.
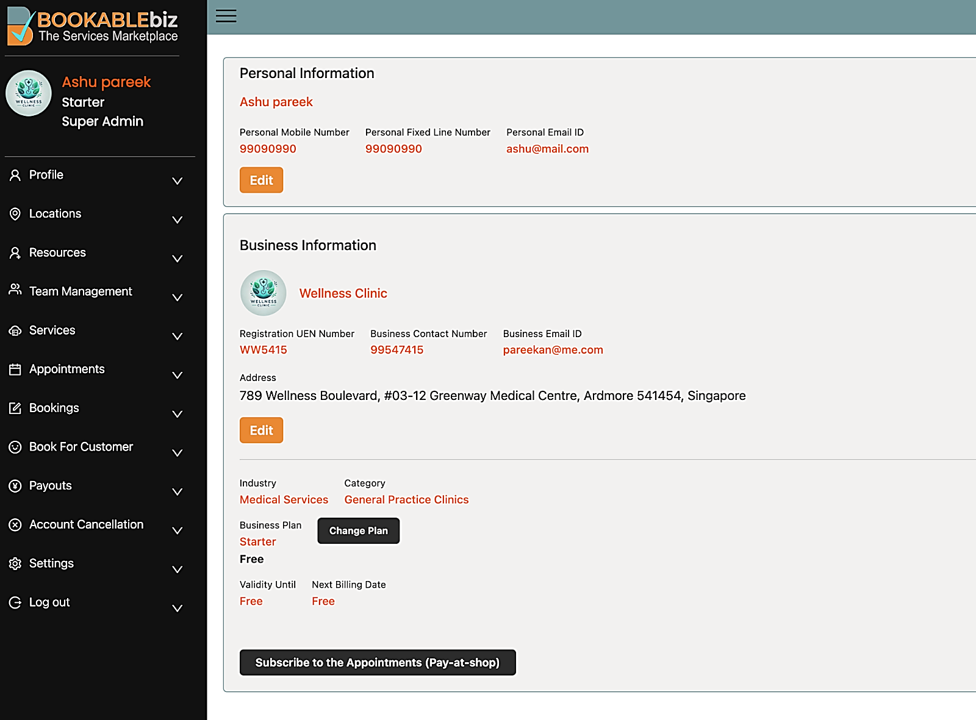
a) Add Business Locations * (Mandatory)
Once your vendor account is activated and you’ve selected your subscription plan, the next step is to add your business locations.This is a mandatory step.
Step 1: Navigate to the “Locations” section in your vendor dashboard.
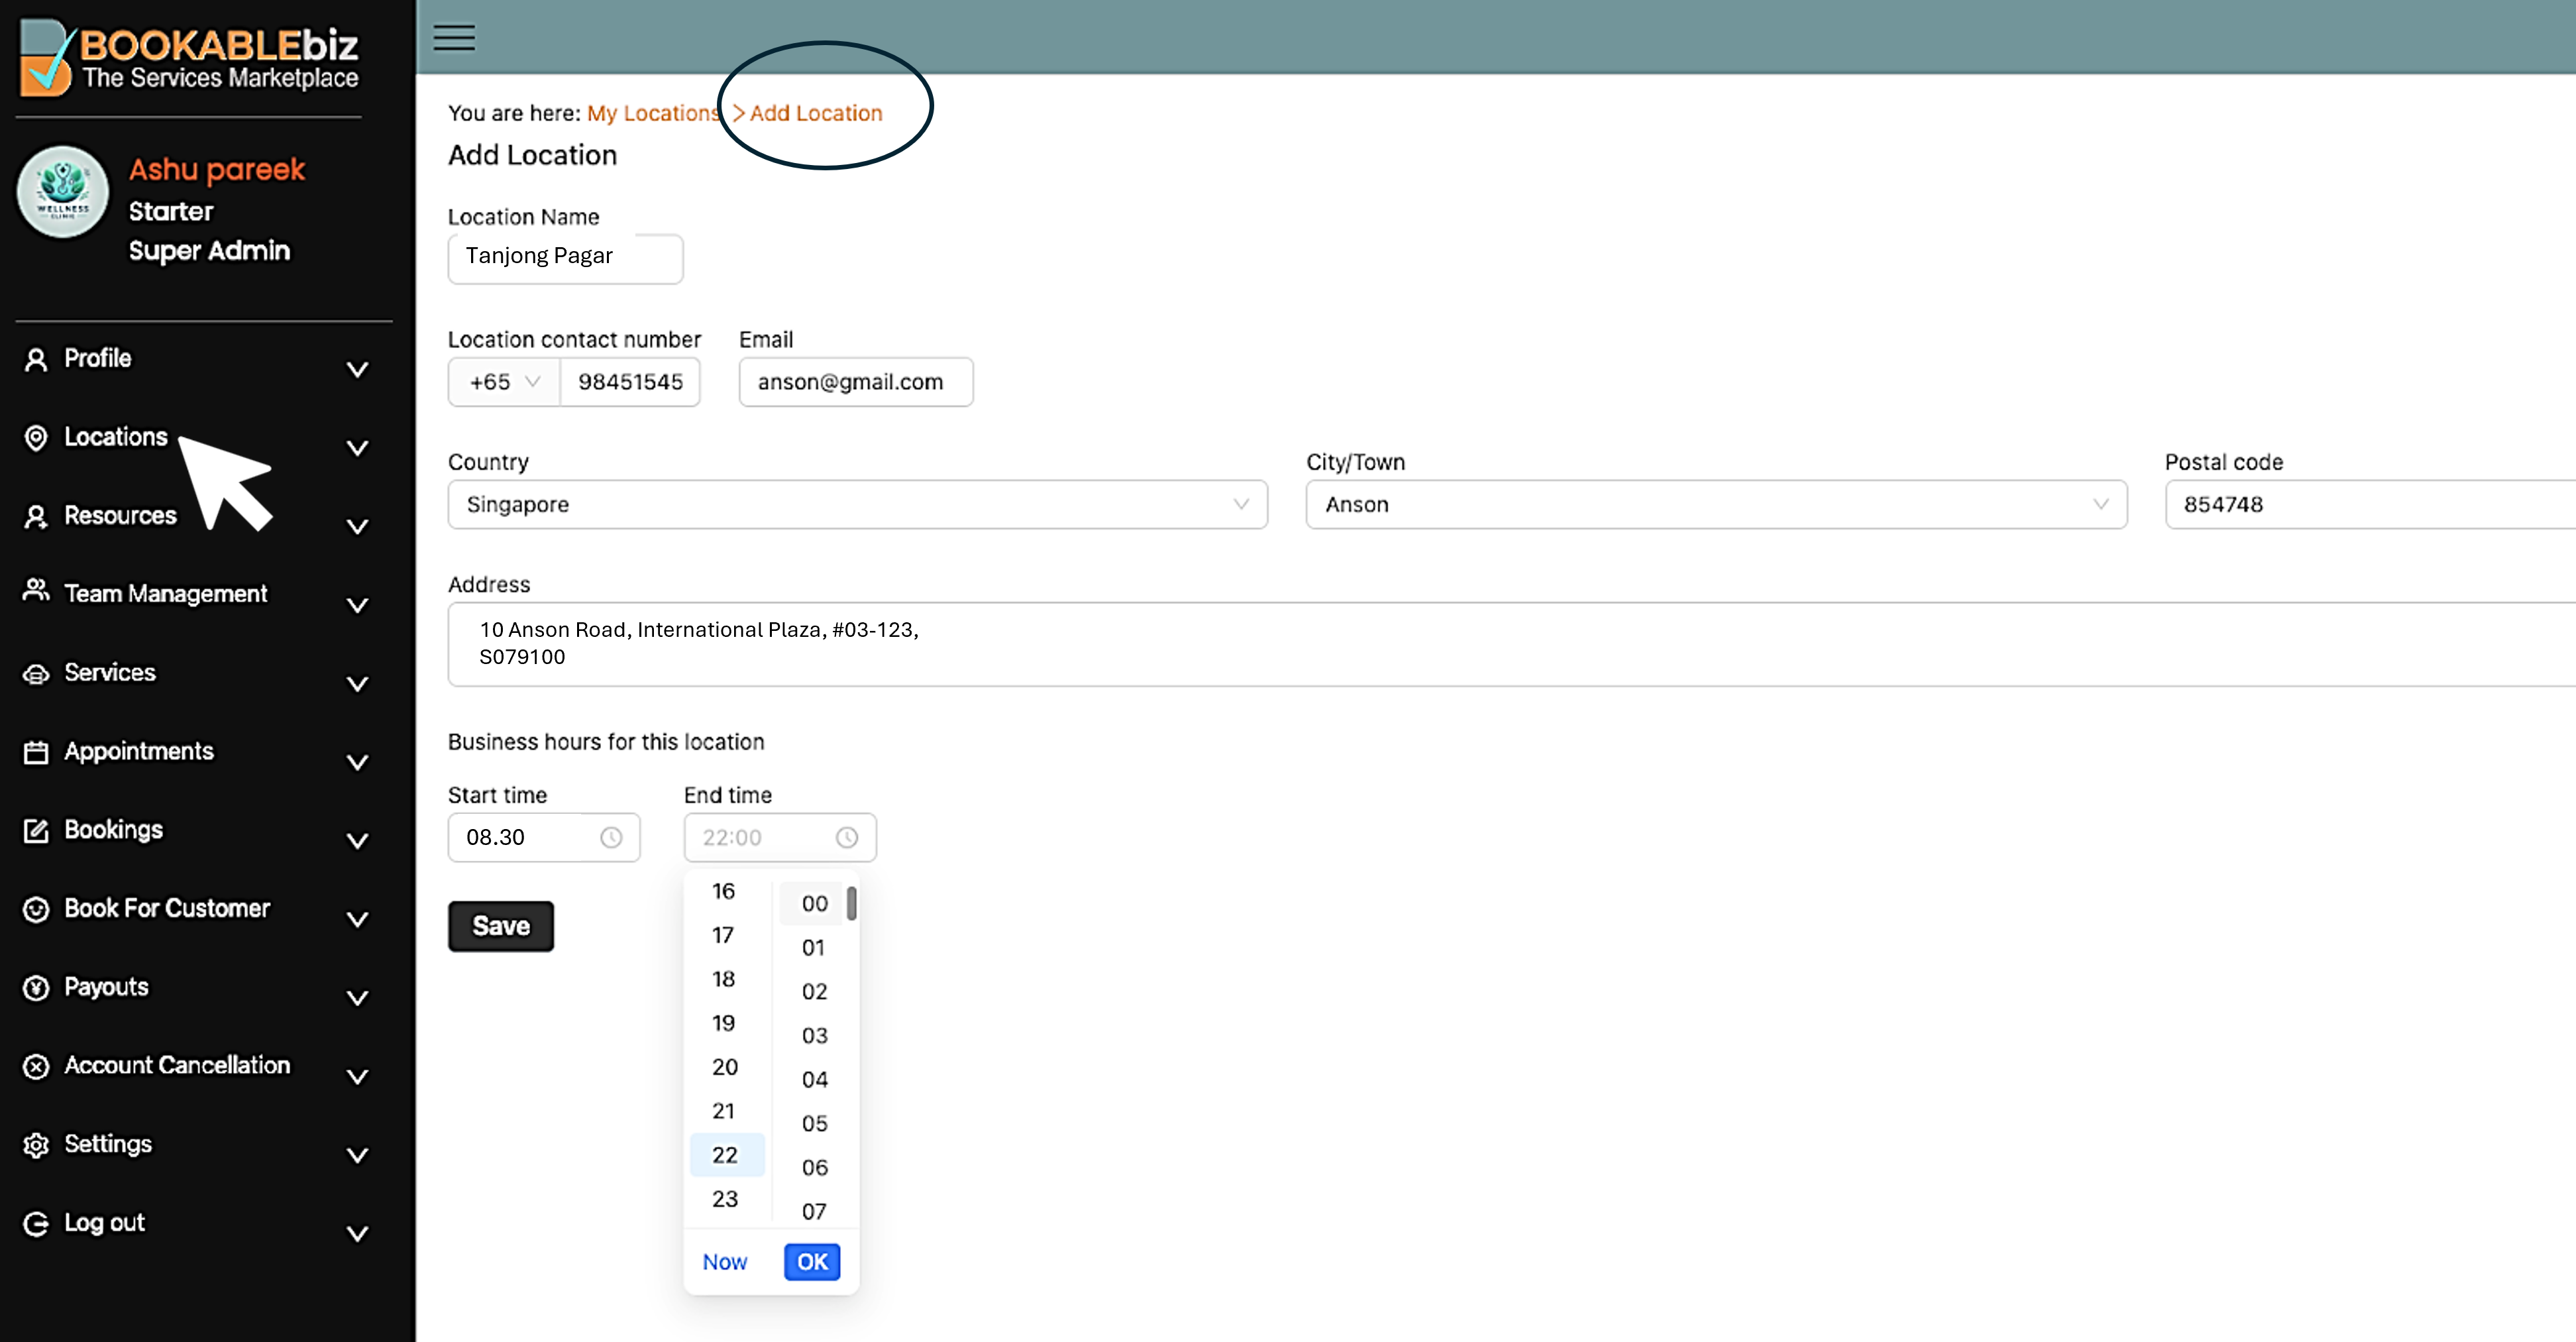
Step 2: Click the “Add Location” button and fill in the required details:
-
- Location Name – Name of the location (This name is only for your reference not for your customers)
- City – The city, town or neighbourhood where the location is situated.
- Address – The full address of your business location.
- Email – A contact email specific to this location.
- Phone Number – A phone number for customer inquiries.
- Business hourse for the location– Specify the hours of operation for this location.
b) Setup Resources For Each Location
You can set up your resources (personnel, rooms, machines, etc.) that are available for bookings for each location. You may skip this step if you prefer to allocate bookings when customers turn up for the date/time slot booked.
Step 2: Navigate to the “Resources” section in your vendor dashboard. Click “Add Resource”.
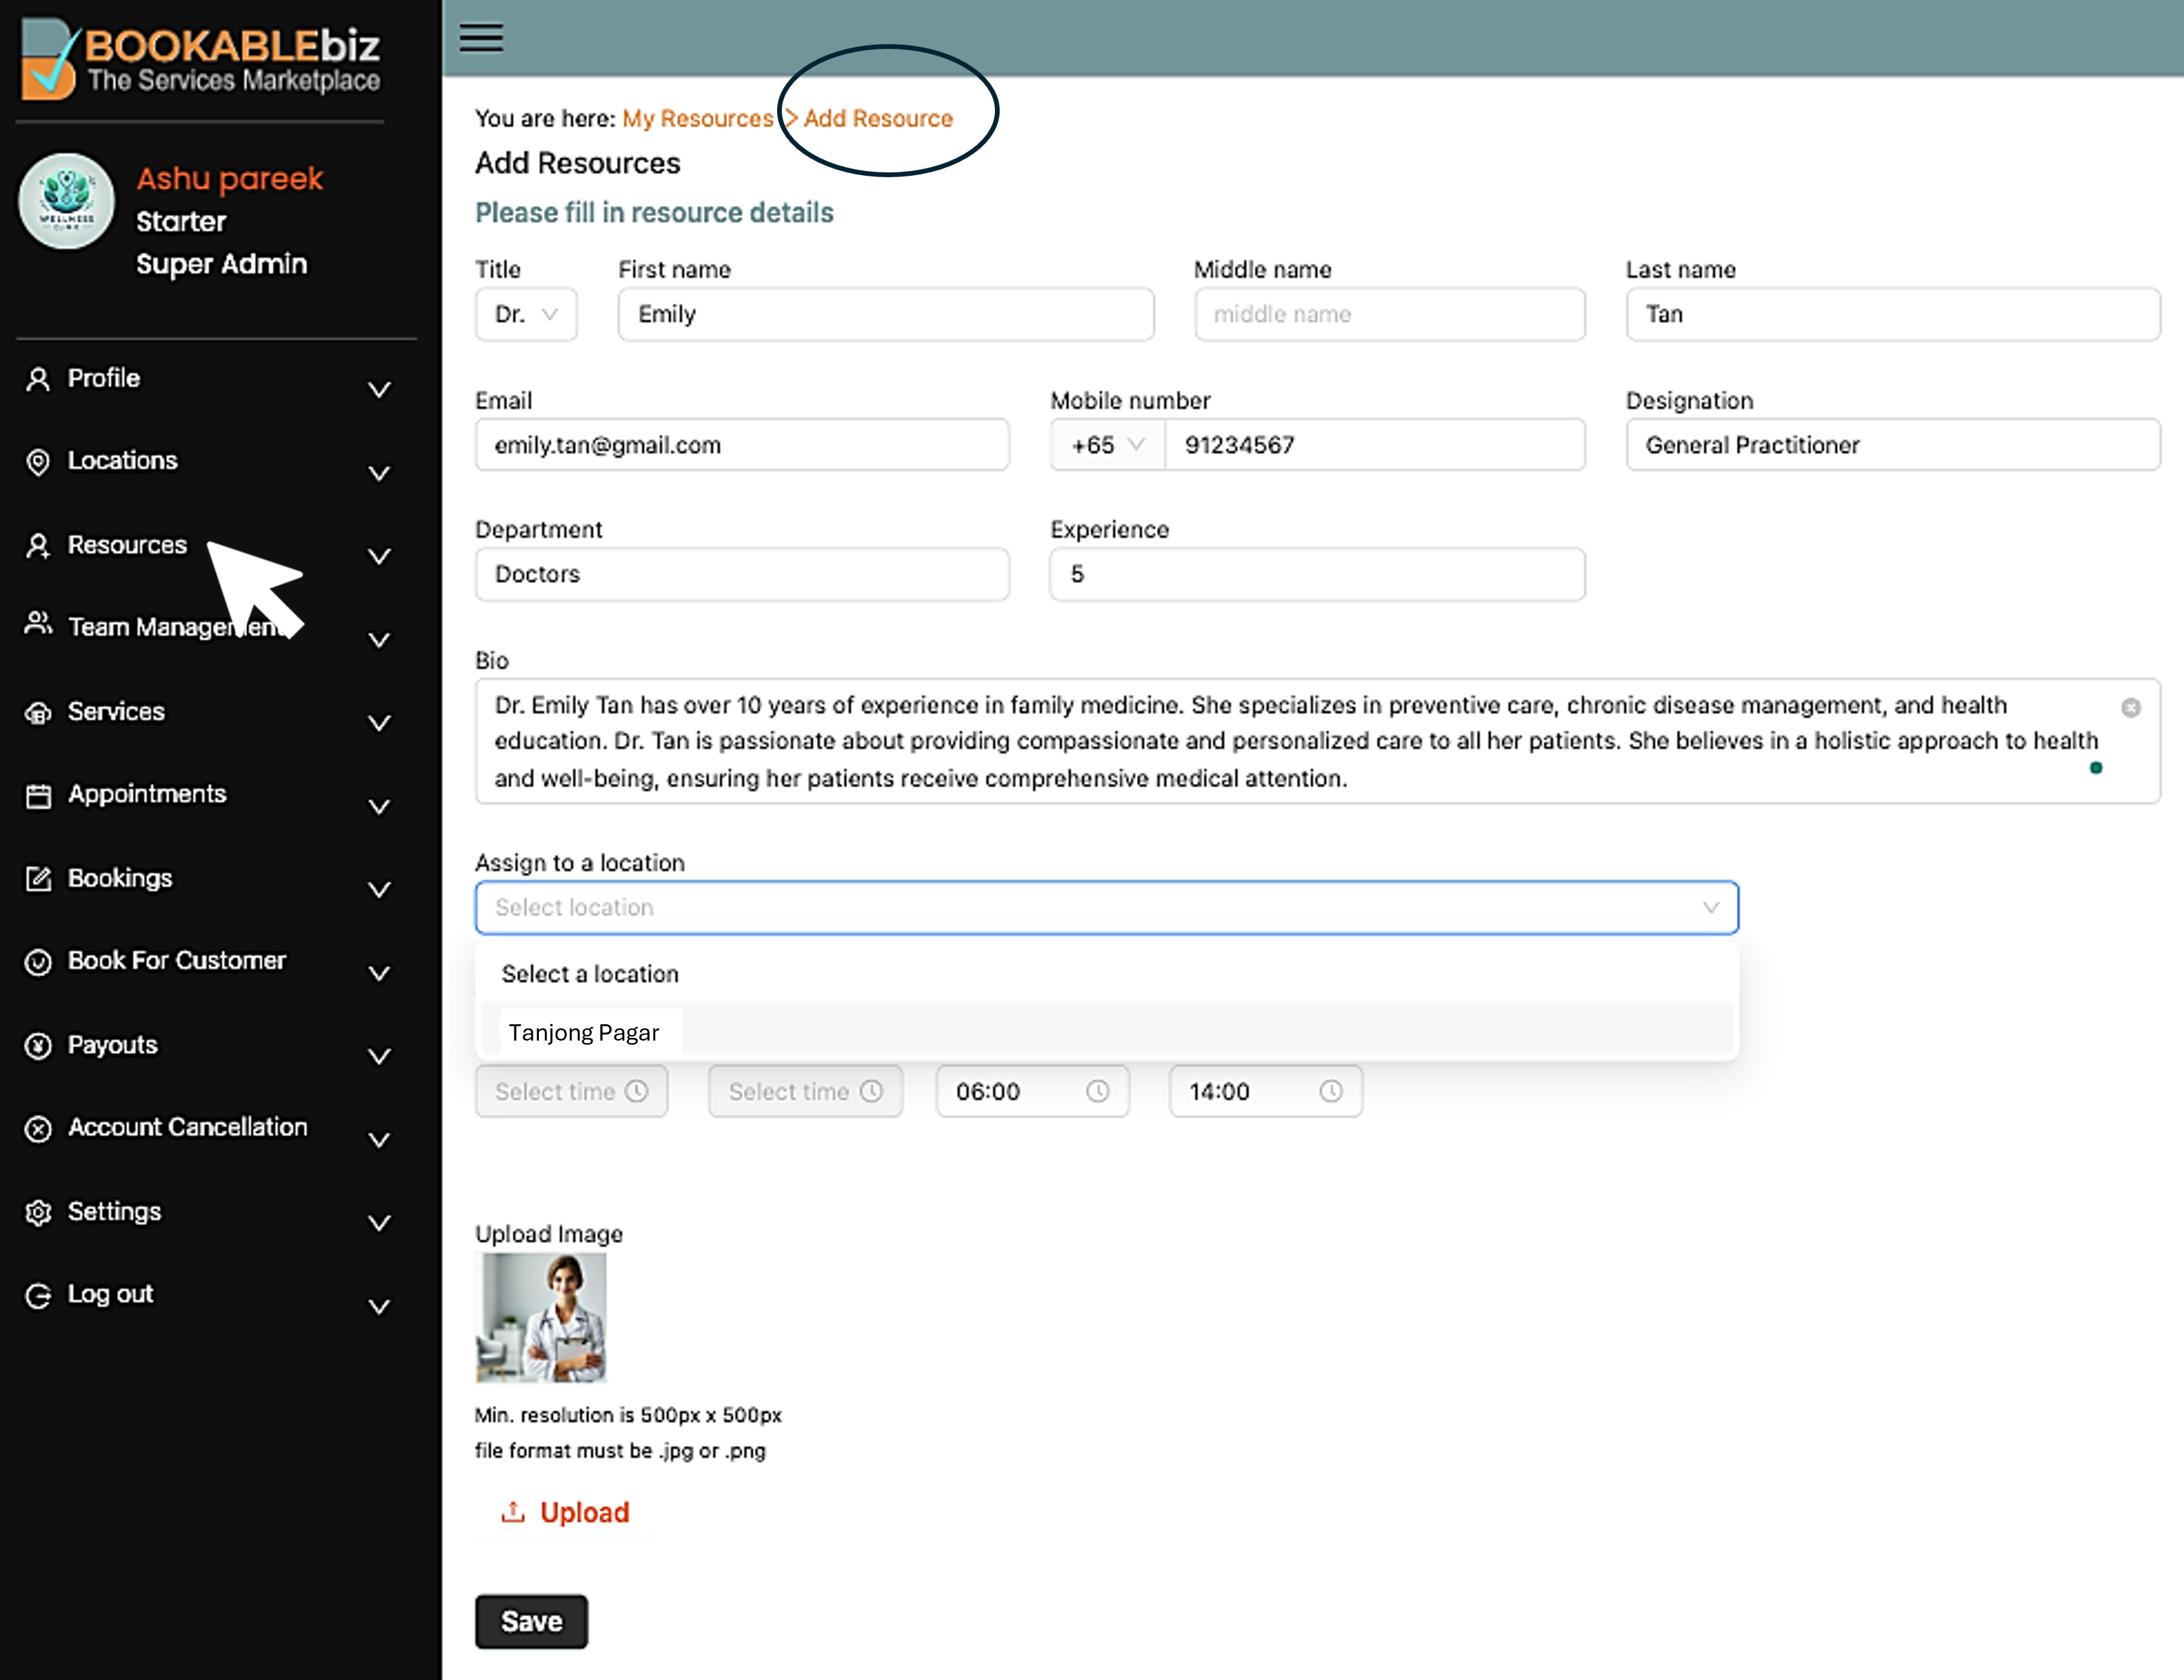
Step 3: Enter the required details for each resource:
-
-
-
- Resource Name – name of the resource.
- Contact details – email and contact number
- Designation – job title
- Department – work section
- Bio (Experience) – Profile description or relevant information about the resource.
- Working Hours – Specify the availability or working hours of the resource
-
-
Step 4: Select the Location where the resource will be assigned from a dropdown list of previously created locations.
Step 5: Click “Save” to map the resource to the chosen location.
Step 6: You may repeat this process to add multiple resources for each location based on your subscription plan.
c) Create Services By Locations
Once resources have been added and mapped to specific locations, the next step is to create services that customers can book.
Step 1: Go to the “Services” section in your vendor dashboard.
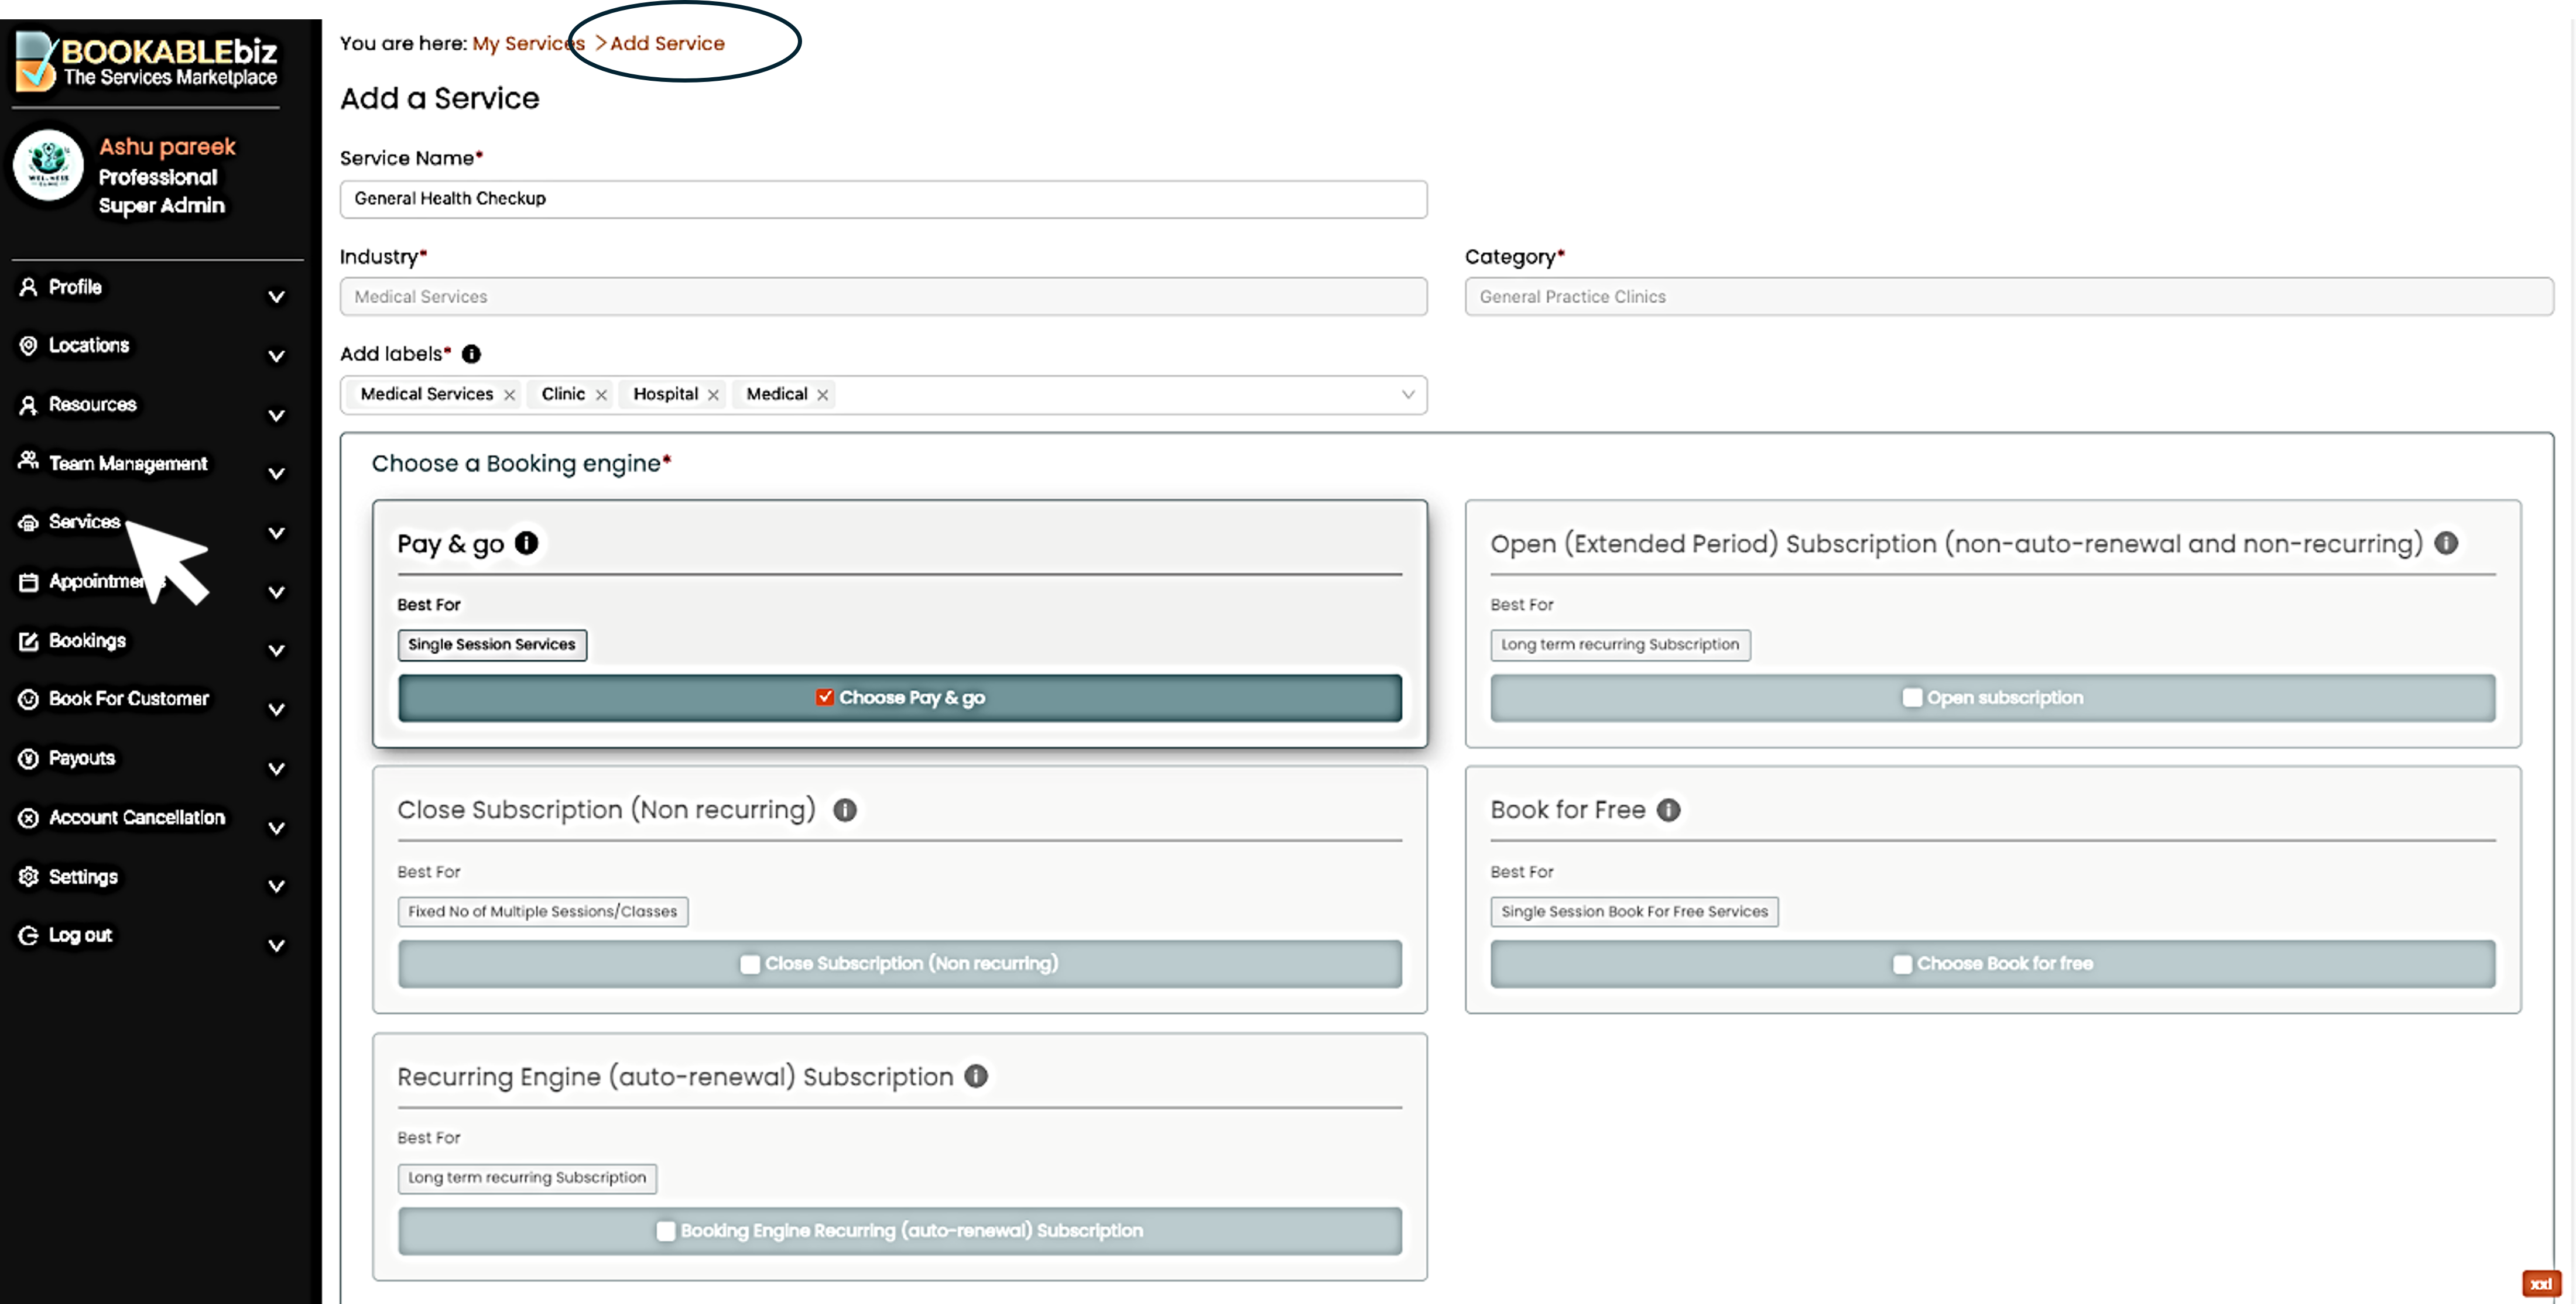
Step 2: Click “Add Service” and provide the necessary details:
-
-
-
- Service Name – Name of the service you are offering.
- Labels – Relevant labels help customers search for and find your services.
- Booking Engine – Our platform offers multiple booking engines depending on your needs, including:
-
-
-
-
- Pay & Go single sessions (+multiple/group booking features)
- Flexible Frequency sessions (Open subscription)
- Fixed Period sessions (Closed subscription)
- Free Bookings
- Recurring Subscriptions (New)
-
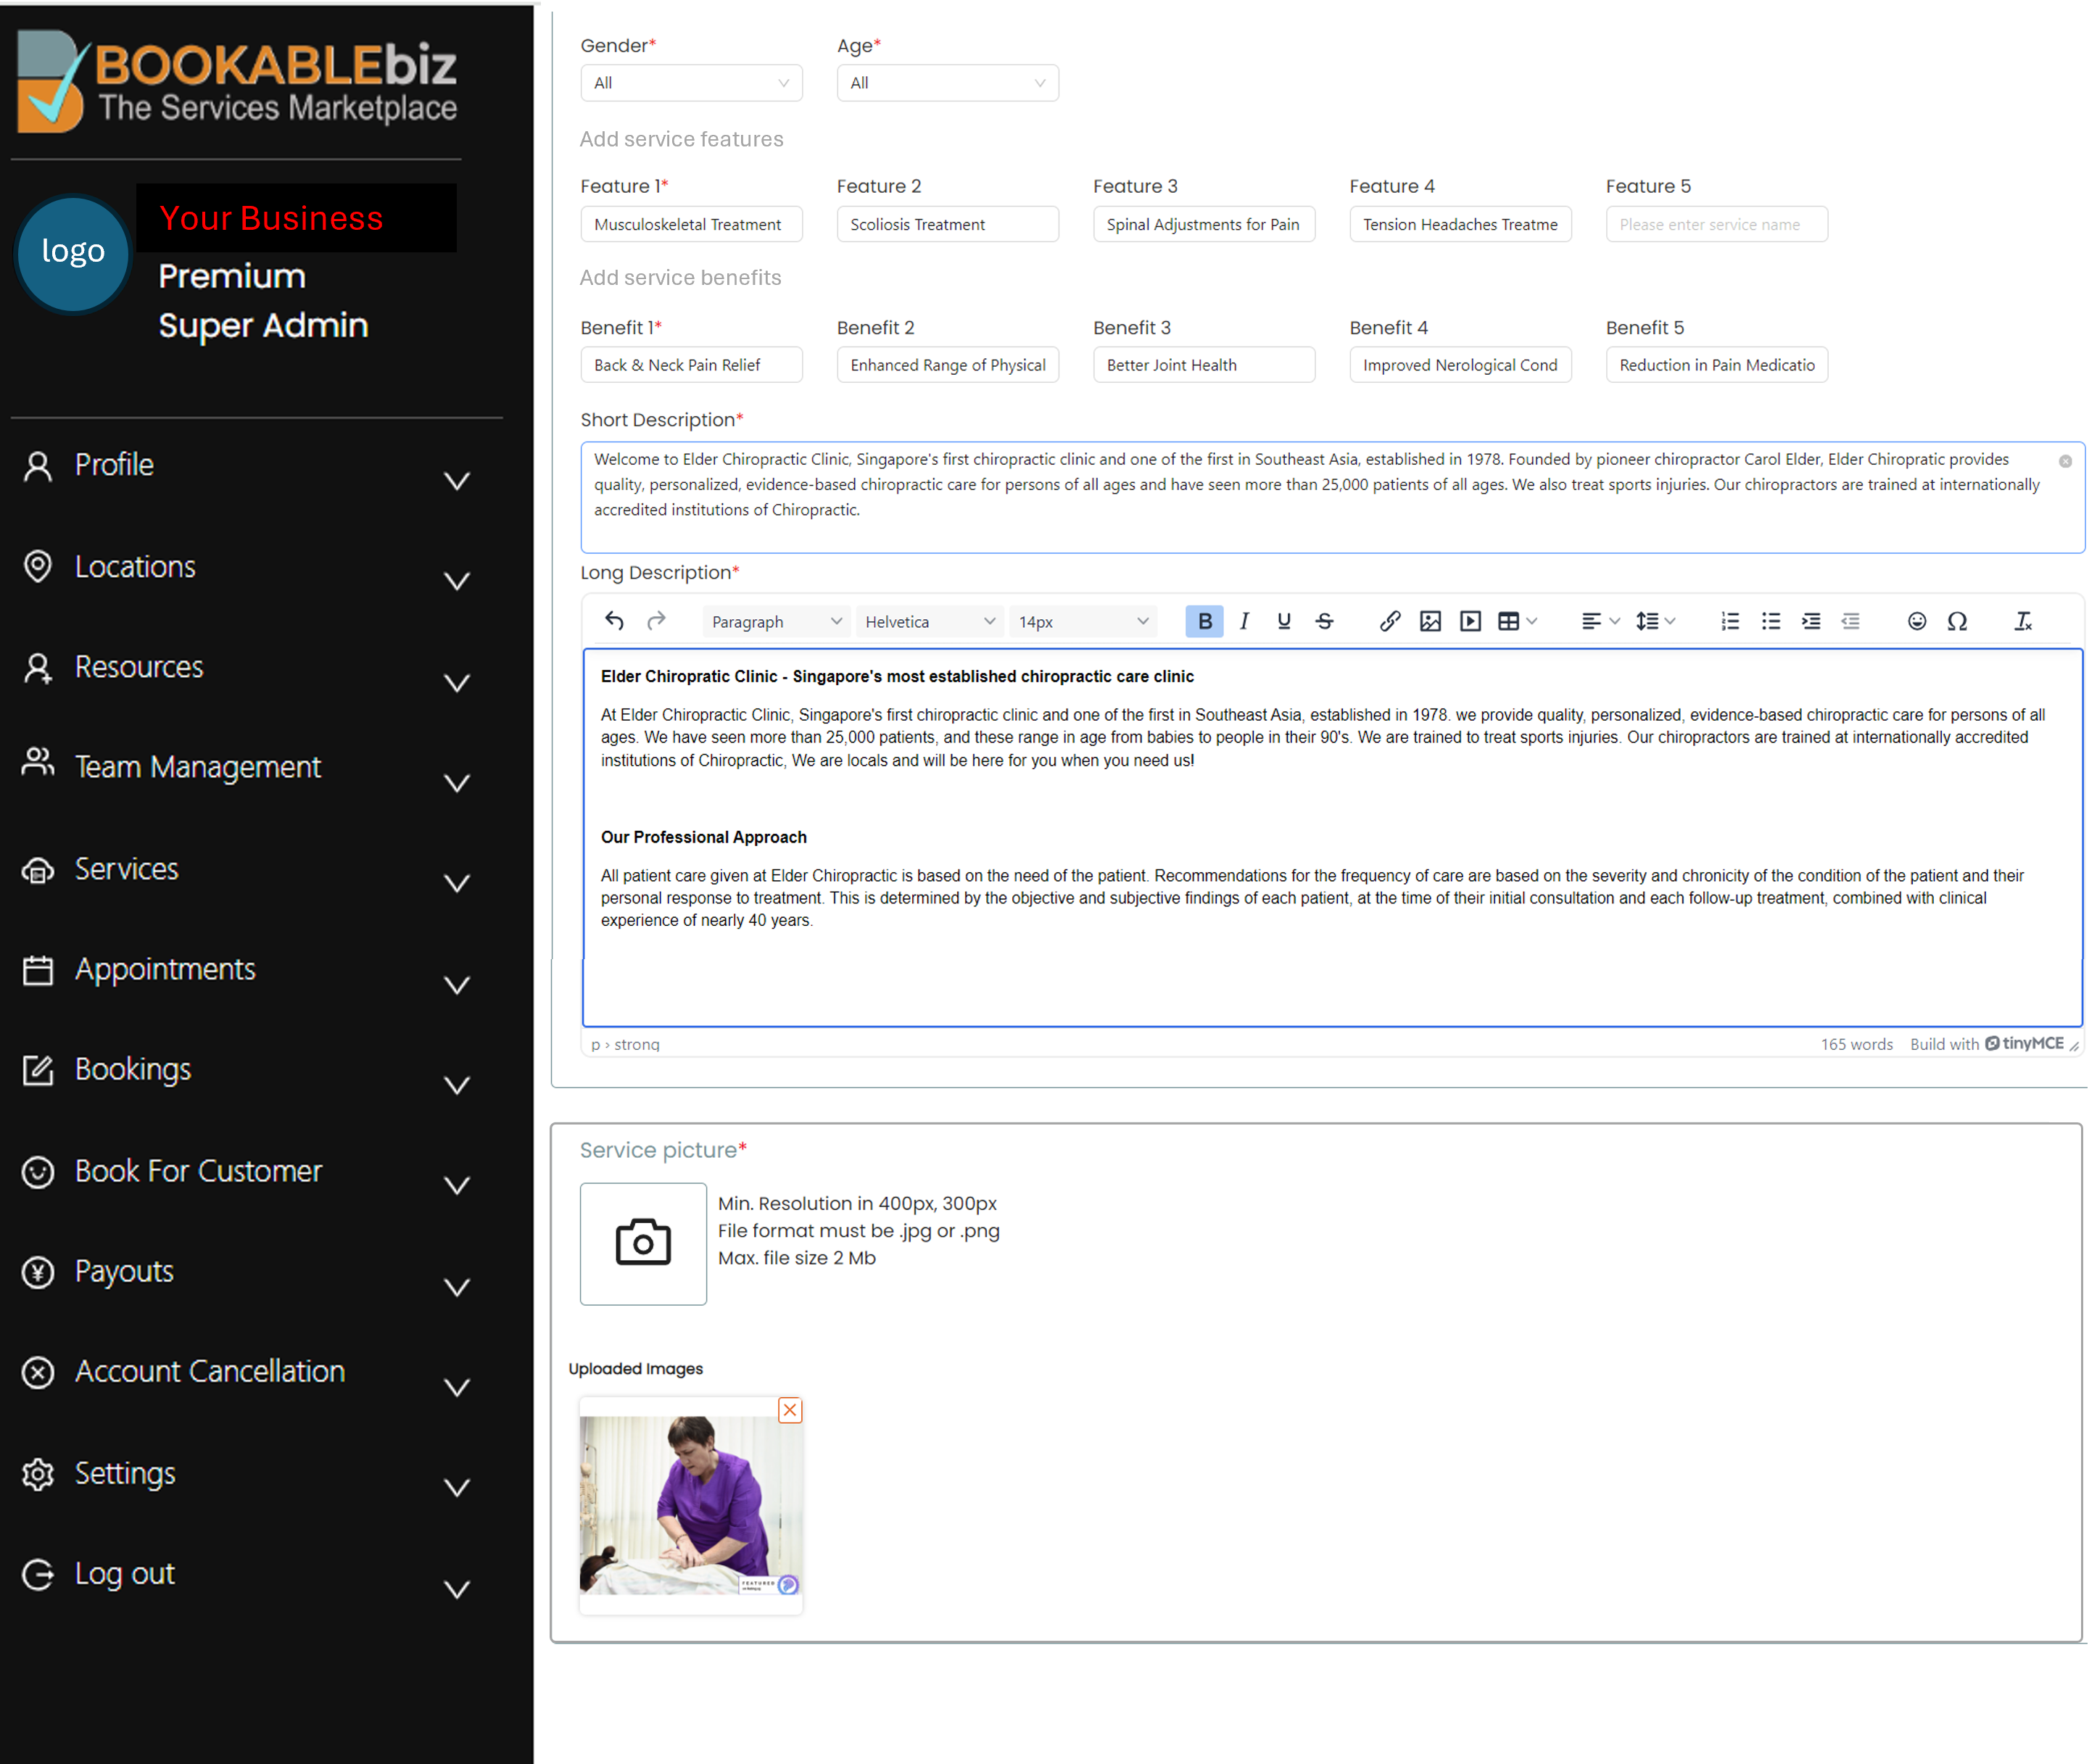
Step 3: Provide the necessary Service information and upload Images:
-
-
-
- Service Description – Specify gender, age, service features, and benefits, A short description and a detailed long description of the service.
- Service Images: You can upload a single image or multiple images reflecting your service.
-
-
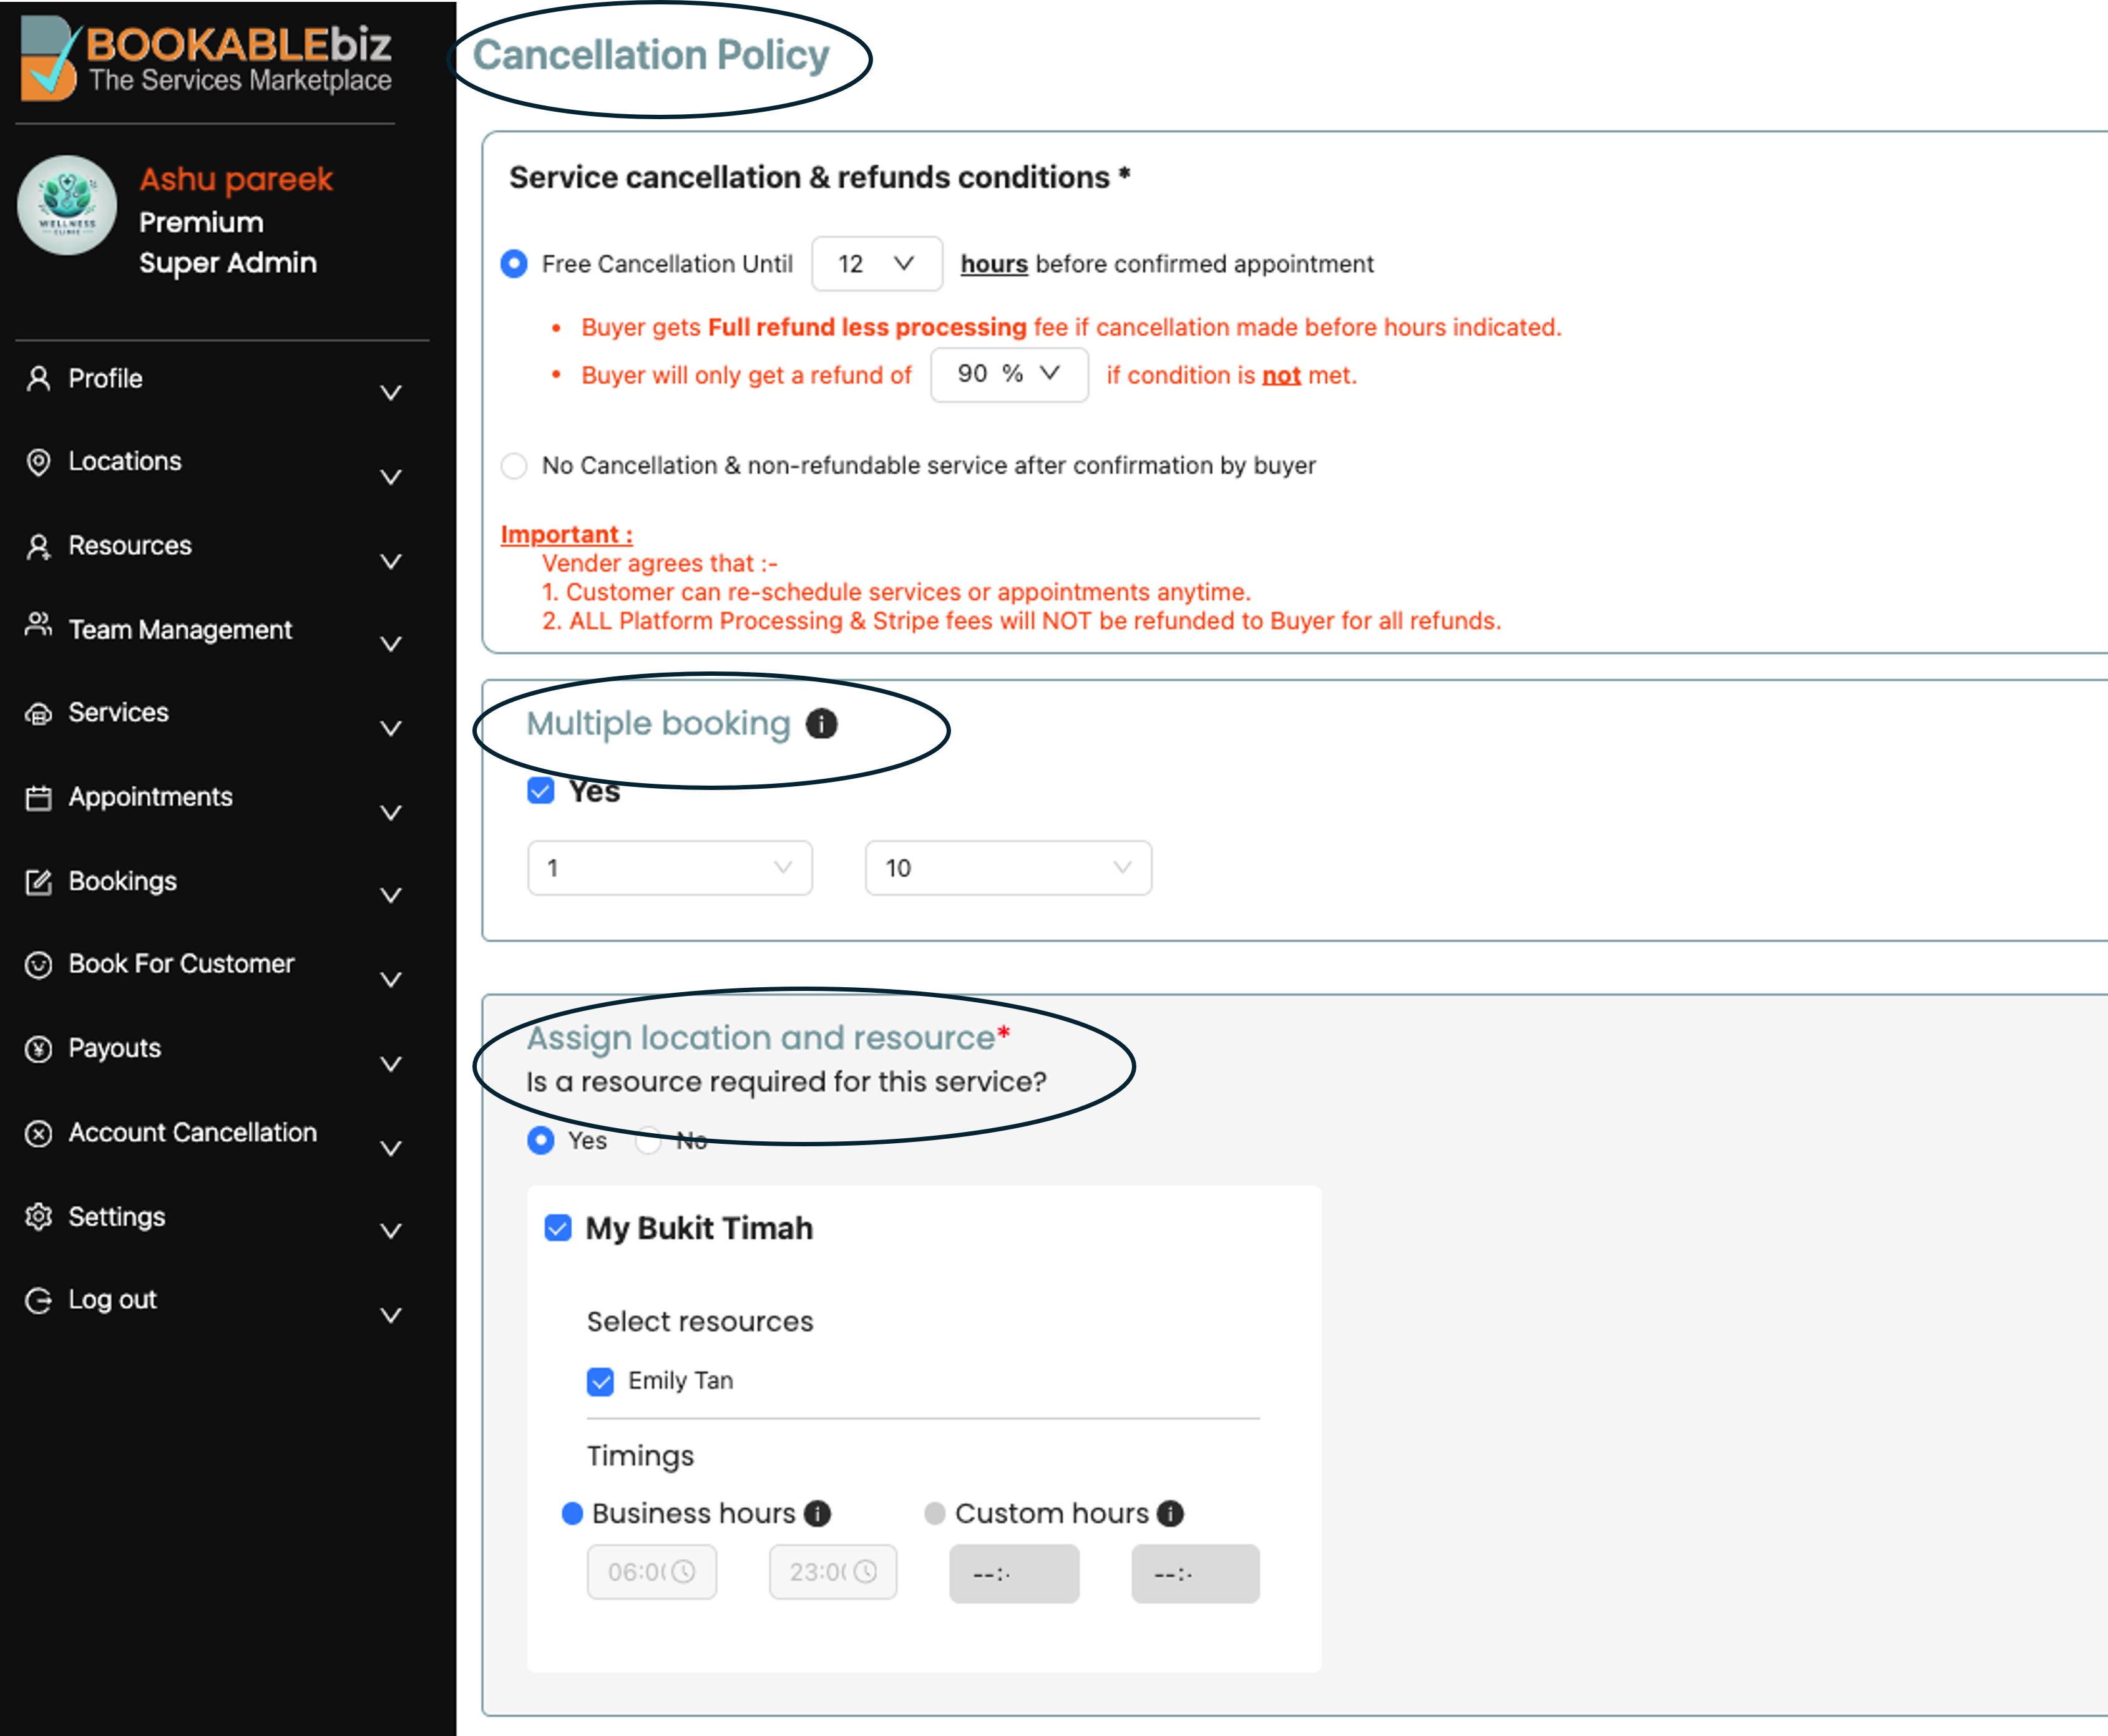
Step 4: Cancellation Policy, Multiple Bookings, Service Location & Resource Assignment
- Cancellation & refund conditions – it is mandatory for you to set specific cancellation & refund conditions on each service individually.
- Multiple bookings: choose this to allow minimum and maximum bookings for a single-slot session.
- Location – Select the location where this service will be available.
- Resource – Assign a resource (e.g., an employee or assigned resource), if any, for the service.
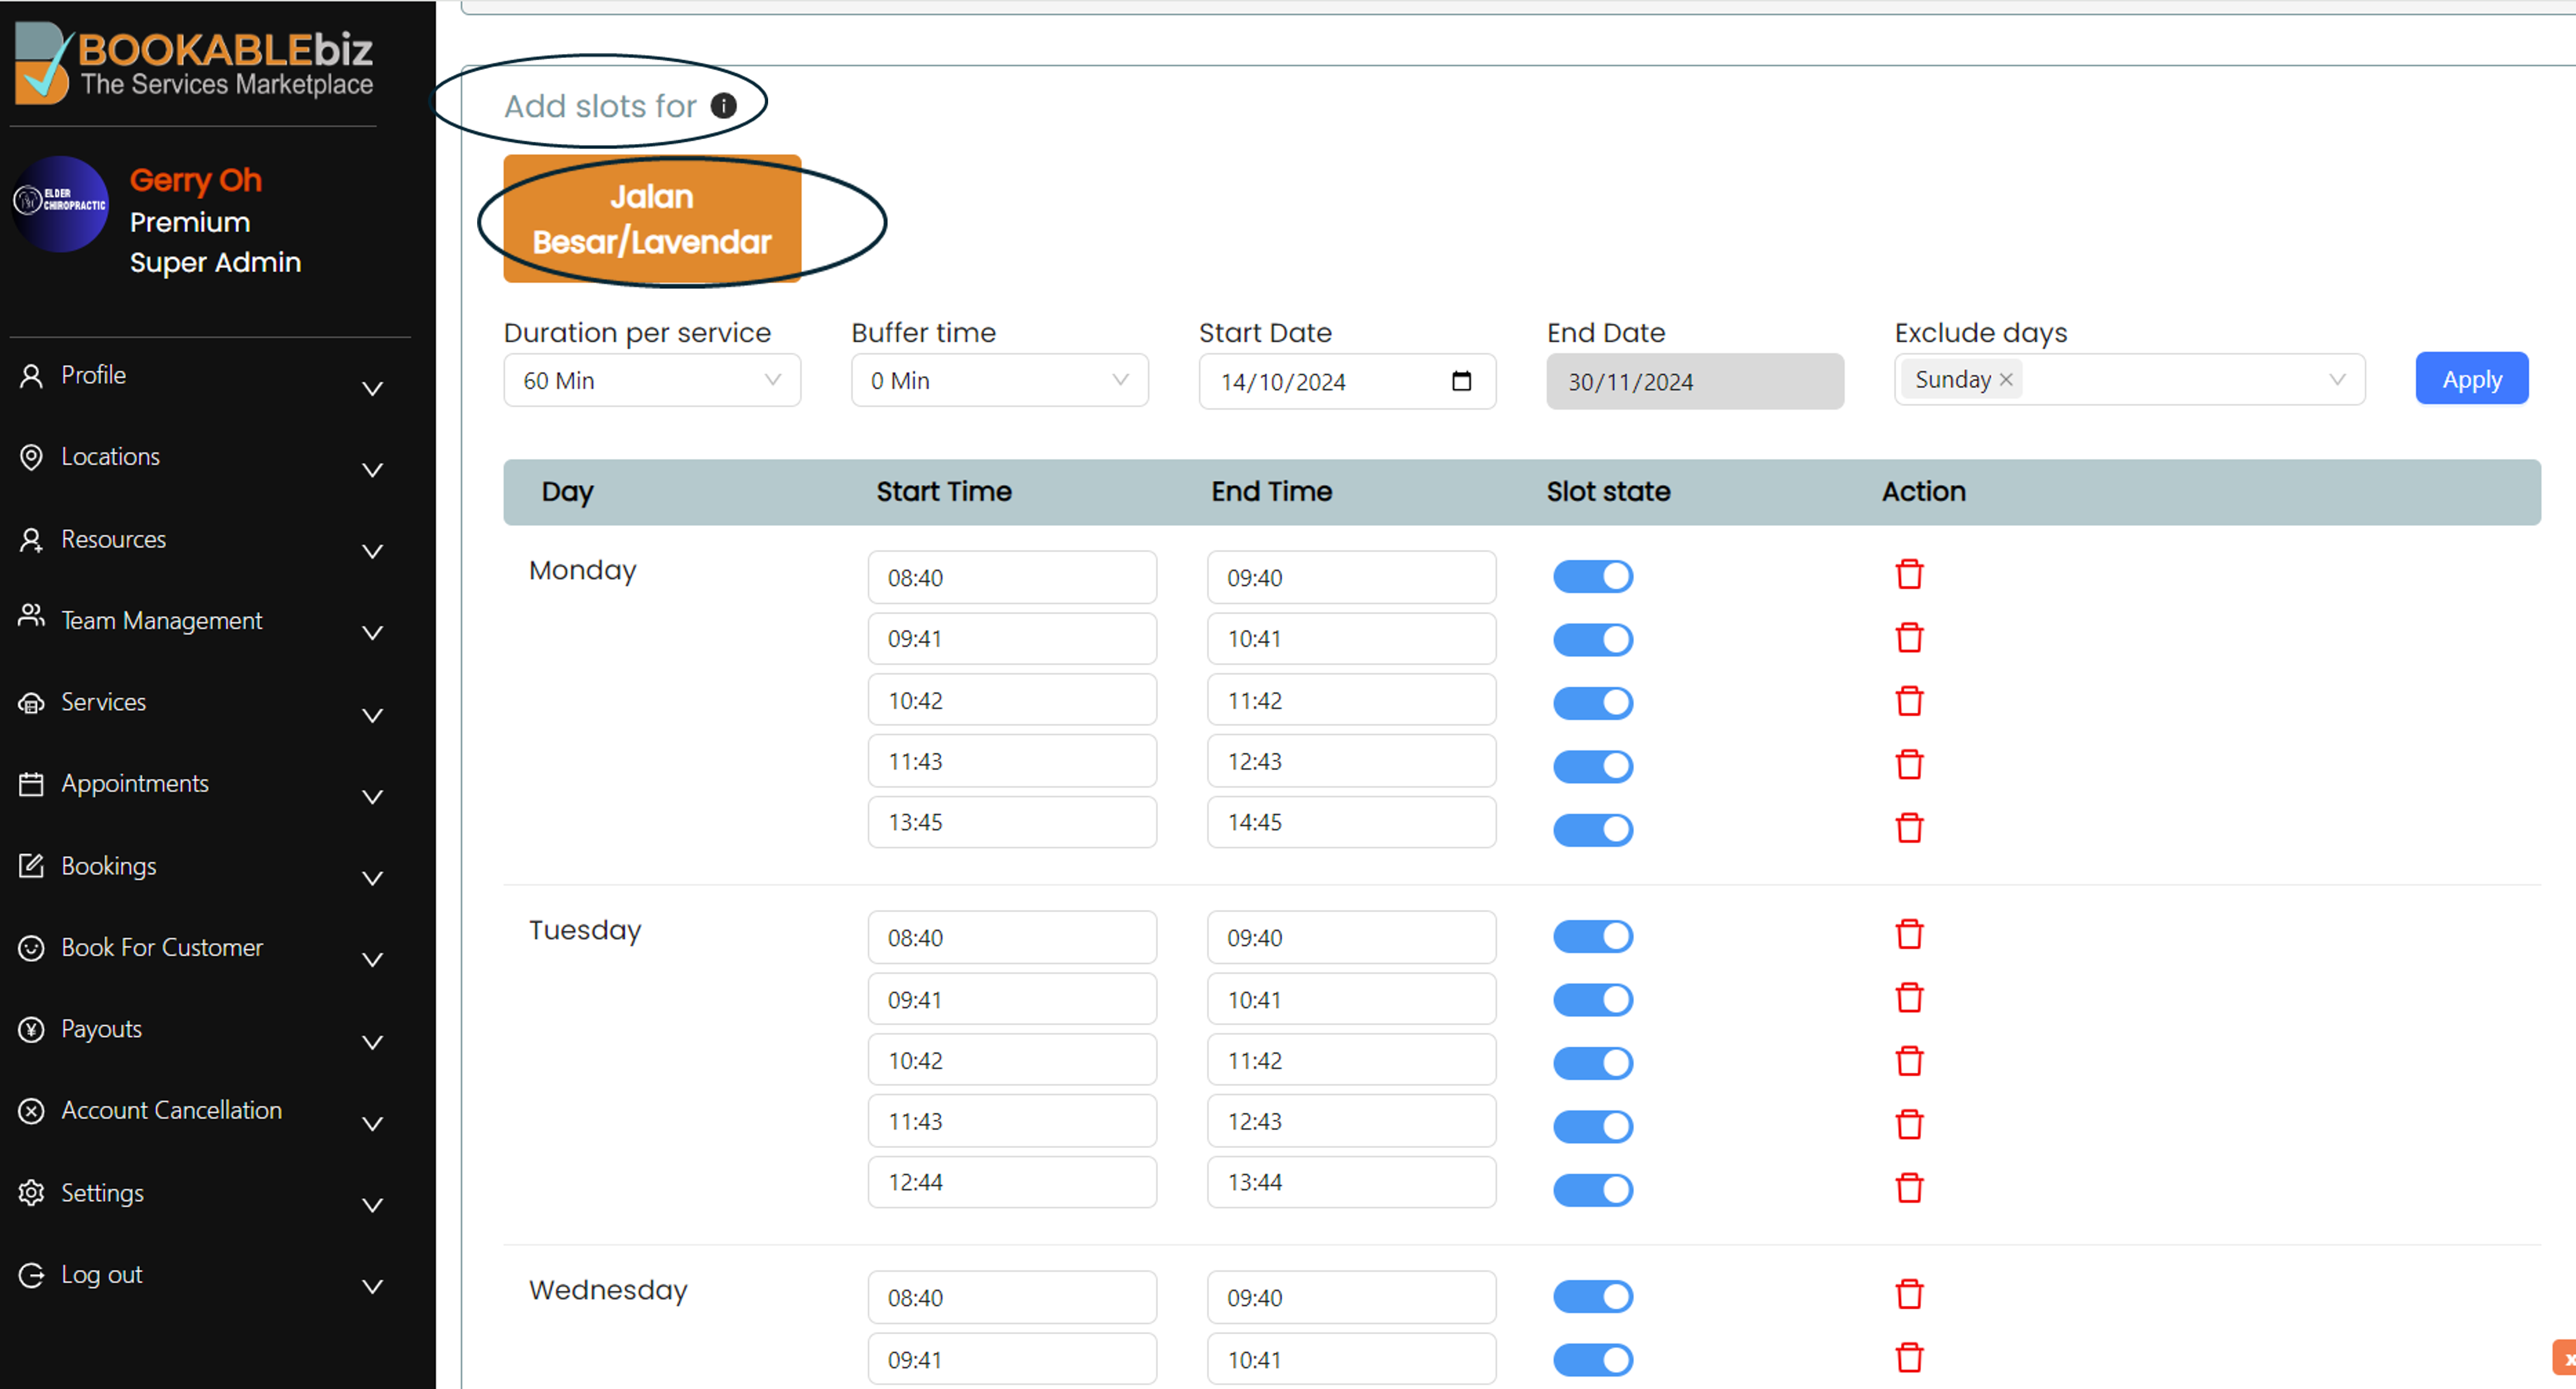
Step 6: Add slots for the service.
-
-
- Location – Select location where services to be offered
- Service Duration – Specify duration (length of time) of service the service session (e.g., 30 minutes, 1 hour).
- Buffer time – Rest period between each slot
- Slots start date – The date from the slots are visible to customers to book the service
- Slots end date – The date till the slots are visible to customers to book the service
- Exclude days – Days of week when the service is not available (All selected days will be disabled between slot start date and slot end date)
-
Note:
- Currently, you can create slots for a maximum period of 3 months. For slots beyond 3 months, you need to update or replicate the service slots for the subsequent 3 months priod.
- Customers can only see and book the slots for the period displayed.
- To make a slot unavailable (to offline a single slot on a particular weekday), just change the slot state by clicking the switch given in front of each slot time, it will give you a list of all the dates for that particular weekday just check the boxes of your desired dates for that particular slot time to make it offline.
Step 7: Set the Price
-
-
- Currency – Default is SGD
- Amount – Specify how much the price of the service should be (inclusive of GST). Your price should factor in the Stripe processing fee and the platform commission fee payable.
- Discount – fill in the applicable discount amount in percentage (%) off the Amount to be given. The system will automatically display the discounted amounted payable.
-
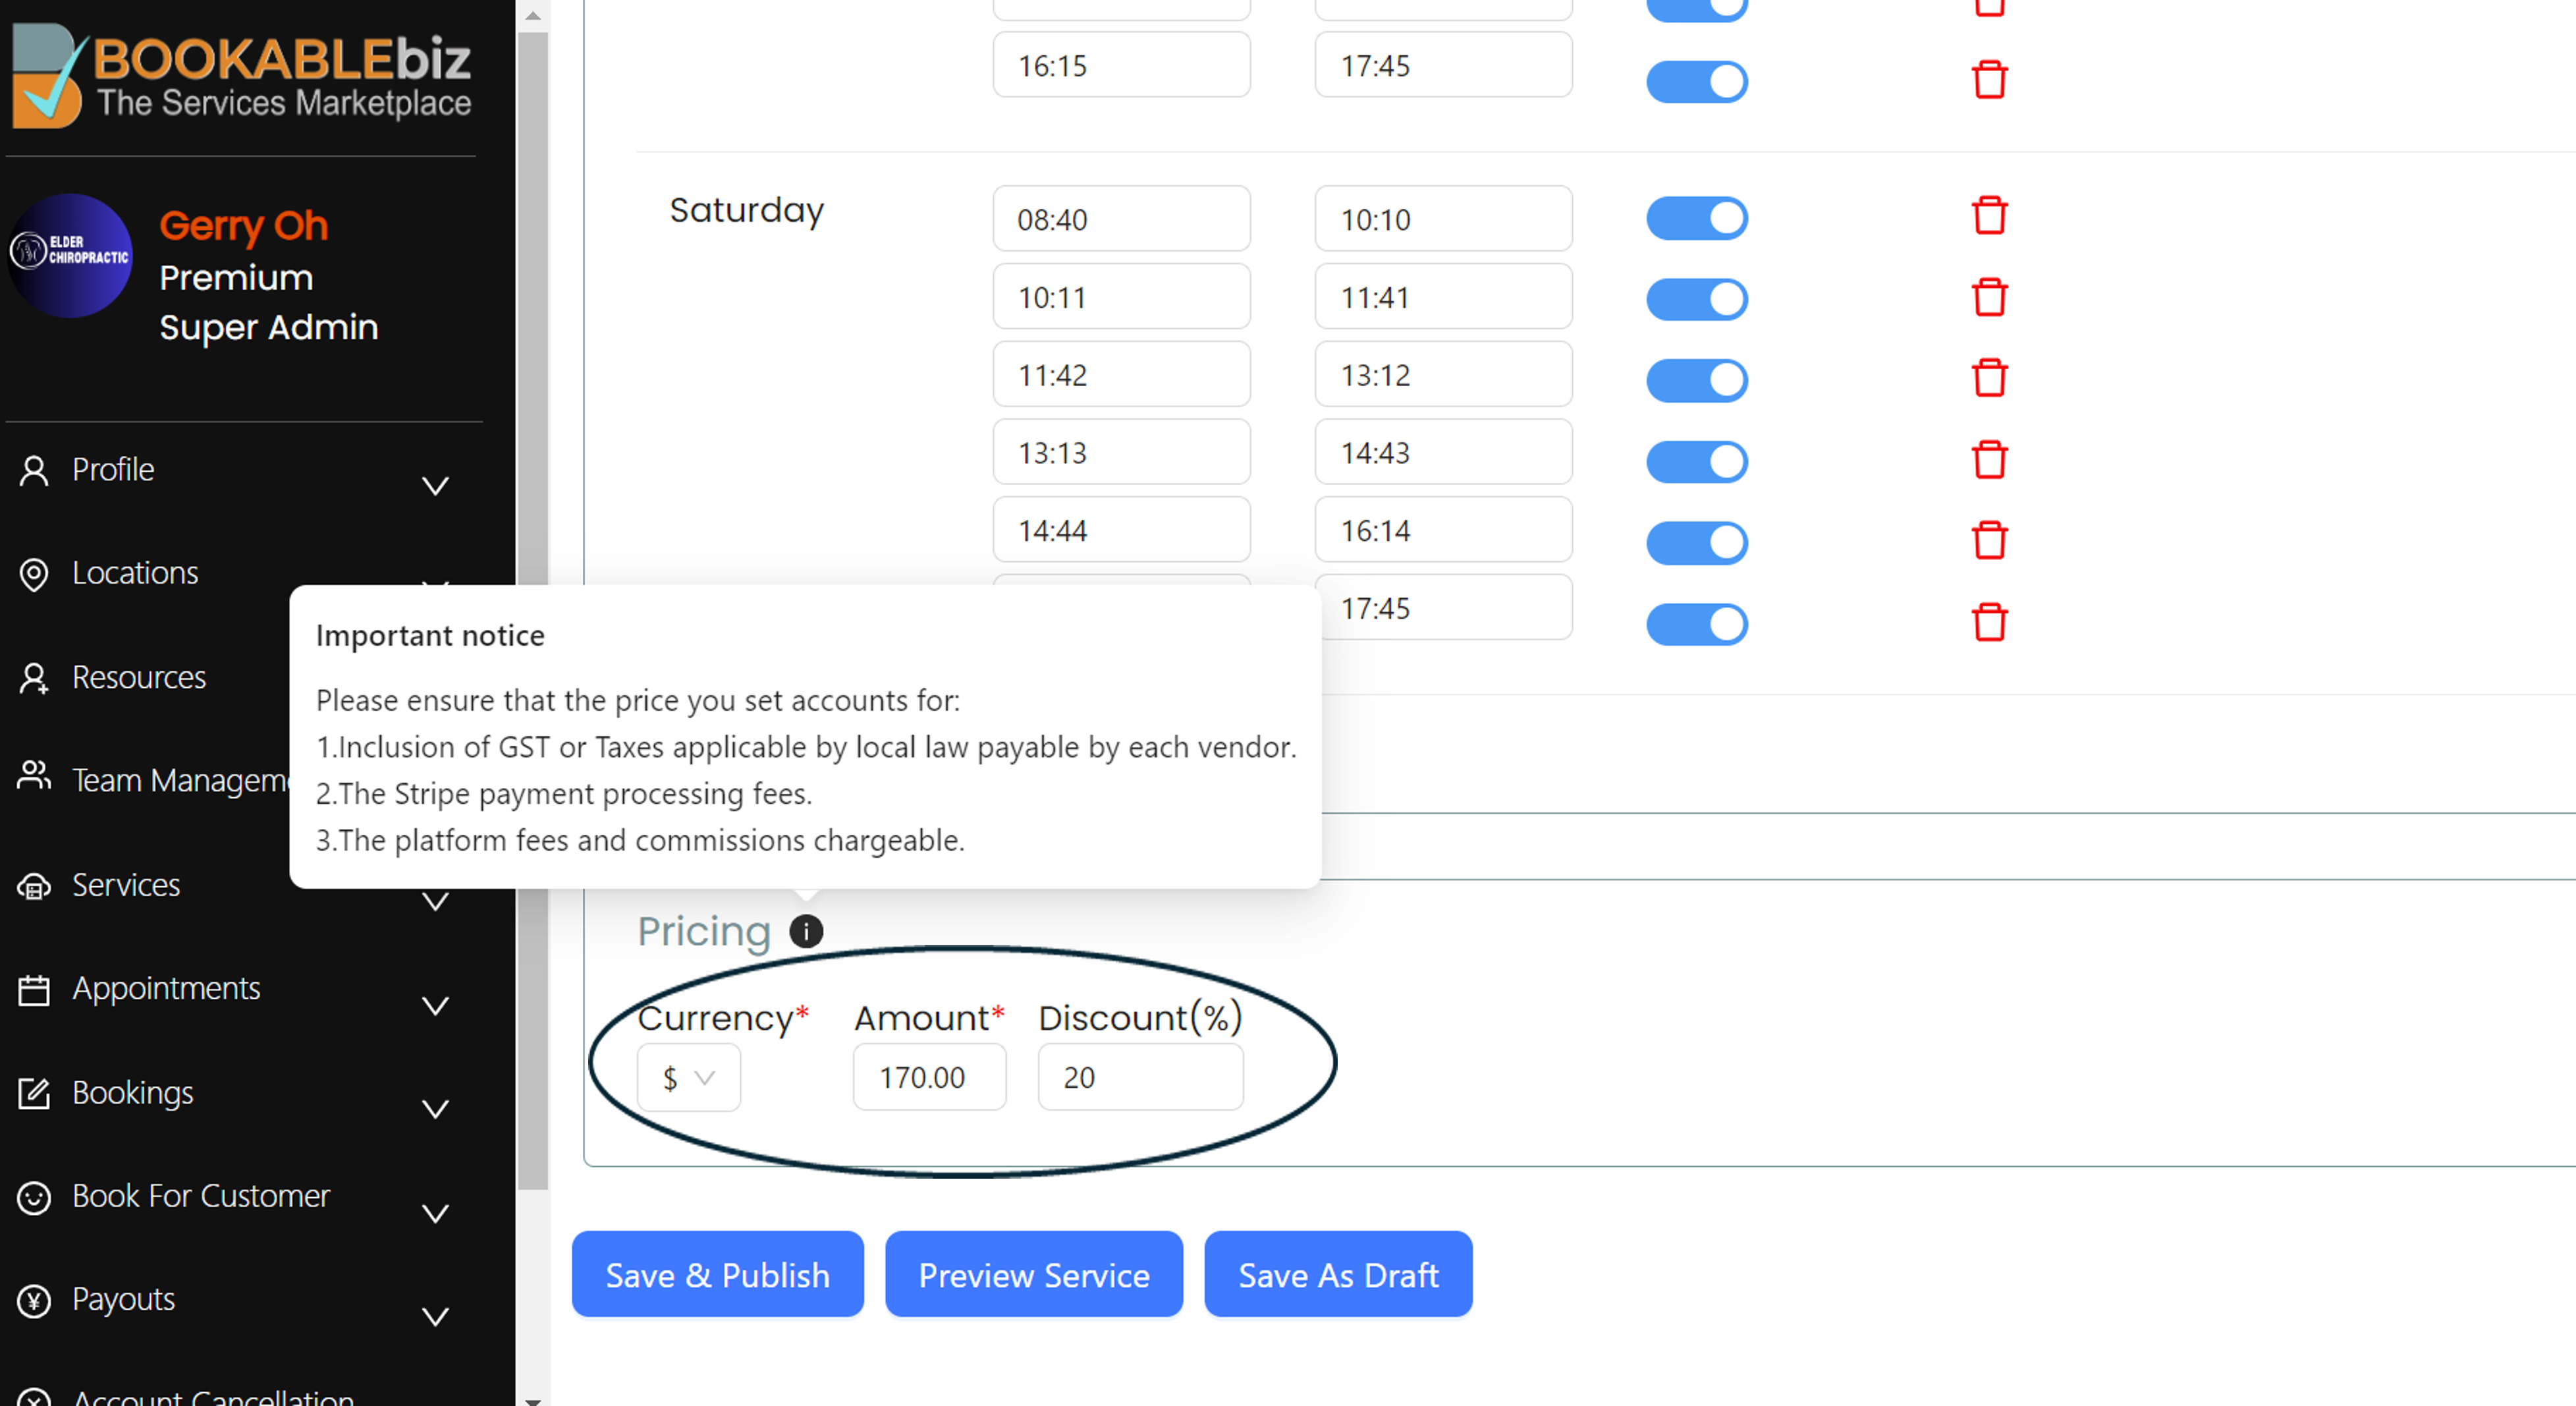
Step 7: Save your service as you want
-
-
- Save & Publish: Save the service and publish on the public website for customers to book.
- Preview Service: You can preview the service and how it will look to your customers.
- Save as Draft: If you do not want to publish at the moment then simply save as draft so later you can continue on the form where you had left.
-
Step 8: Repeat this process to add multiple services across different locations using different booking engines.
